How to Build a Lyrics Website with Laravel Scout and Algolia
Laravel Scout is a driver-based library for adding full-text search to Eloquent models. If you're not familiar with Laravel or Eloquent models in general, we have a good premium course available here.
In this tutorial, we will create a minimal lyrics web site using Laravel Scout and Algolia. To do so, we need a CRUD app to work with our data, and a search interface to let users search through the content. However, instead of creating the full app from scratch, let's just install the finished CRUD app that we've created for this tutorial.
Algolia is a hosted search engine API, providing us with all the tools and resources we'll ever need to create products with awesome search capabilities.

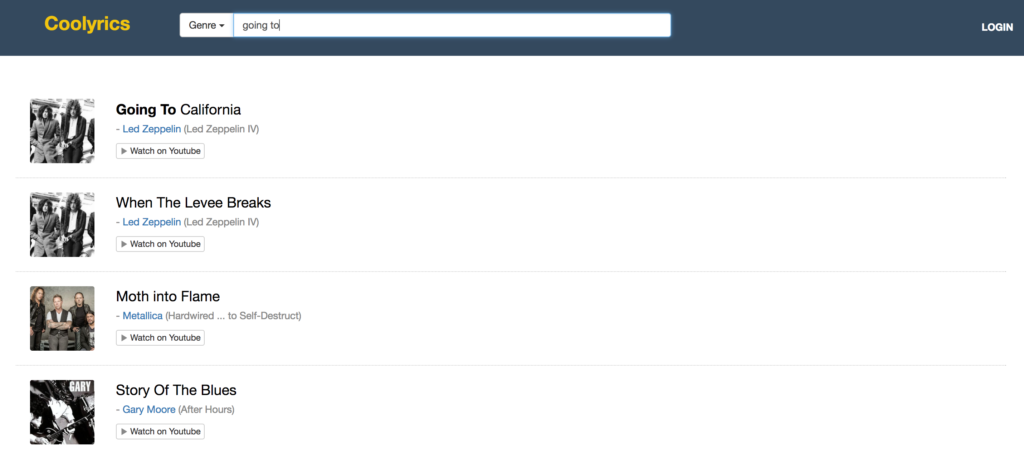
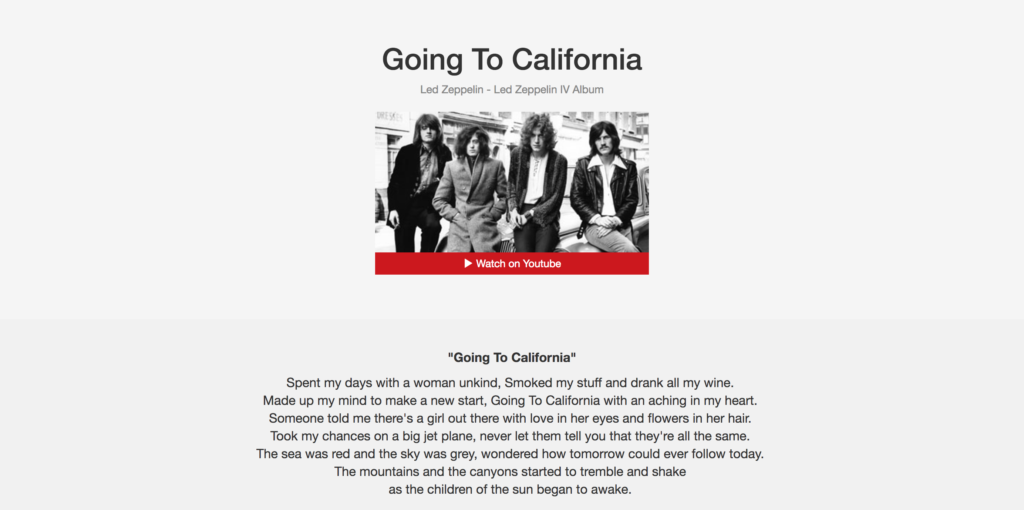
By the end of the tutorial, we'll have a product like this:
Bootstrapping the Application
I assume you already have your development environment up and running. However, If you need a good development environment to get into action right away, you should use Homestead Improved.
Stranger to Vagrant? Read this. Want to go more in depth? Buy our book on PHP Environments!
Feel free to skip this part if you already have a similar application or you have enough experience to build one relatively quickly.
CRUD Application
The most convenient way to download the pre-built CRUD project is to clone it:
git clone [email protected]:lavary/lyrics-crud.git coolyrics
cd coolyrics
composer install
Setting Up the Database
Now, let's create a MySQL database. The settings below apply to the Homestead Improved environment mentioned above. Change as needed.
mysql -h localhost -u homestead -psecret
mysql> CREATE DATABASE lyrics
After the database has been created, we make a copy of .env.example (located in our project's root directory) and name it .env. This is where we put our database credentials:
#...

DB_CONNECTION=mysql
DB_HOST=127.0.0.1
DB_PORT=3306
DB_DATABASE=lyrics
DB_USERNAME=root
DB_PASSWORD=password

# ...
Again, apply to your own preferences as needed.
Now, we run the migration command to create the tables:
php artisan migrate
Filling Up the Database with Sample Data
A lyrics website contains information about musicians and their work, and, of course, their songs' lyrics. To make a bare minimum data structure, we have created only two Eloquent models for this project, namely Artist and Song. The Artist model has a one-to-many relationship with the the Song model. This means each artist can have many songs and each song belongs to an artist in our database.
Before moving forward to the next section, you may go ahead and insert a few records into the database, starting with your favorite artists and then adding a few songs for each.
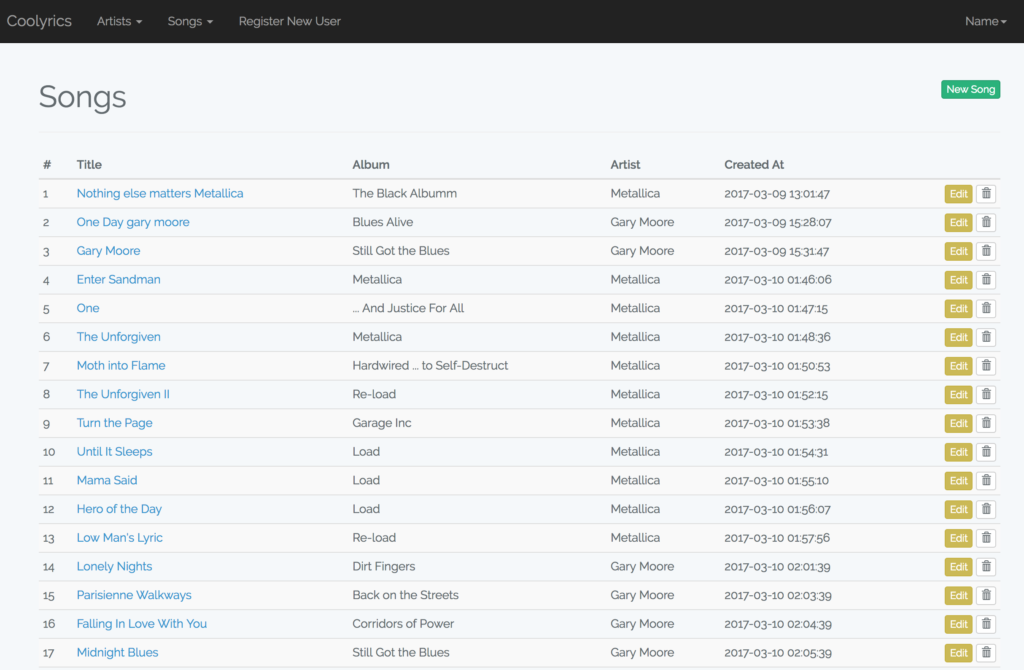
This is what we have so far:
You can also use the SQL file included with the project files and dump it into your database with the following command:
mysql -h localhost -u {USERNAME} -p{PASSWORD} lyrics < /path/to/the/sql/file
You can also import the file by using your favorite MySQL management application, like Sequel Pro, MySQL Workbench or PHPMyAdmin.
Installing Scout
Let's continue by installing Scout:
composer require laravel/scout
Then, we add the service provider to $providers in the config/app.php file:
Laravel\Scout\ScoutServiceProvider::class,
Now we need to generate the Scout's configuration file using the publish:config artisan command:
php artisan vendor:publish --provider="Laravel\Scout\ScoutServiceProvider"
As a result, a configuration file named scout.php is generated inside the config directory. We'll edit this file later.
To make a data model searchable, we need to use the Laravel\Scout\Searchable trait inside the respective model class. That's the Song model in our case:
<?php

namespace App;

use Illuminate\Database\Eloquent\Model;
use Laravel\Scout\Searchable;

class Song extends Model
{
    use Searchable;

protected $fillable = ['title', 'album', 'lyrics', 'youtube_link'];

public function artist()
    {
        return $this->belongsTo('App\Artist');
    }
}
Setting Up Algolia
As planned, we'll use Algolia as our search engine API.
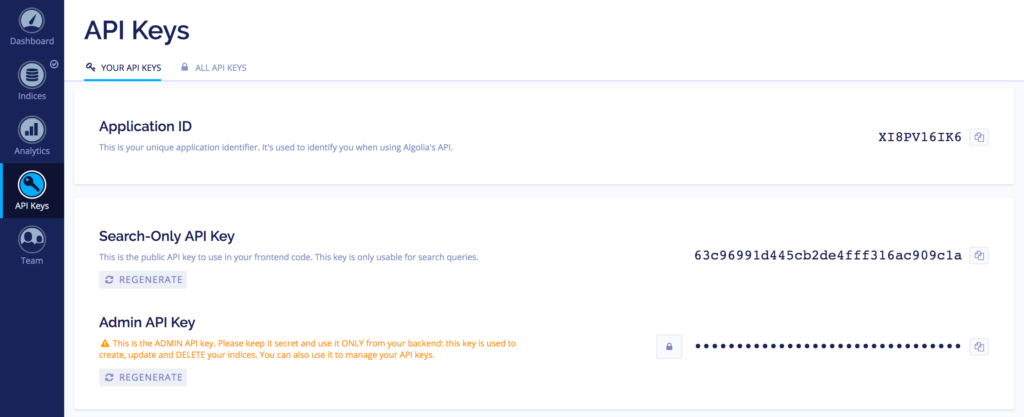
First, let's create an account to obtain our application ID. Scout requires Application ID and Admin API Key to operate. After the registration is complete, we can find our credentials under API Keys in the left menu.
Now, we open the config/scout.php configuration file and put our credentials there:
<?php
'algolia' => [
        'id' => env('ALGOLIA_APP_ID', ''),
        'secret' => env('ALGOLIA_SECRET', ''),
    ],
It's a good practice to keep the keys in .env and load them into scout.php using the env() or getenv() functions.
To use the Algolia's API, we need to install Algolia's SDK for PHP, which is also available as a Composer package:
composer require algolia/algoliasearch-client-php
Indexing Our Data
At this point, we need to create our index on Algolia. Each record in the index is a schema-less JSON object (each one represents a record in our database) with a set of attributes that can be used for searching, displaying, ranking and filtering data.
Rather than indexing the whole record, we only need to index the data needed for the above operations. This helps keep our index clean and optimized.
Apart from that, the index is not a relational database, meaning when searching through the index, we cannot use complex where clauses or SQL joins. To work around this limitation, we should define a custom structure for our index records. On the other hand, we should join all the needed tables, preparing a customized JSON object before indexing.
To do this, we override the toSearchableArray() method in the Song model (this method is added to the class by the Laravel\Scout\Searchable trait). By default, the toSearchableArray() method returns the $this->toArray() output as our index object (when sending the index record to Algolia), whereas we need additional data, like artist's name, genres and the image URL, which reside in another table - the artists table.
Here's how we do it:
<?php

namespace App;

use Illuminate\Database\Eloquent\Model;
use Laravel\Scout\Searchable;

class Song extends Model
{
    use Searchable;

protected $fillable = ['title', 'album', 'lyrics', 'youtube_link'];

public function toSearchableArray()
    {
        $genres = array_map(function($item) {
            return trim($item);
        }, explode(',', $this->artist->genres));

return array_merge( $this->toArray(), ['artist' => $this->artist->name, 'photo' => $this->artist->photo, 'genres' => $genres]);
    }

public function artist()
    {
        return $this->belongsTo('App\Artist');
    }
}
Since the genres field may contain a comma-separated value in our database (it has a simple text field in our CRUD app), we separate genres using explode. Then, we iterate over the results, stripping off any unwanted spaces before and after each part - using the map() function:
<?php

// ...

$genres = array_map(function($item) {
            return trim($item);
        }, explode(',', $this->artist->genres));

// ...
Finally, we merge the output of $this->toArray() with our desired attributes, returning the final array.
<?php

// ...

return array_merge( $this->toArray(), ['artist' => $this->artist->name, 'photo' => $this->artist->photo, 'genres' => $genres]);

// ...
Why do we need to index a randomly generated string like image URL you may be wondering. We'll get to this shortly.
For the existing records in the database, we can import the index at once with the scout:import artisan command, like this:
php artisan scout:import "App\Song"
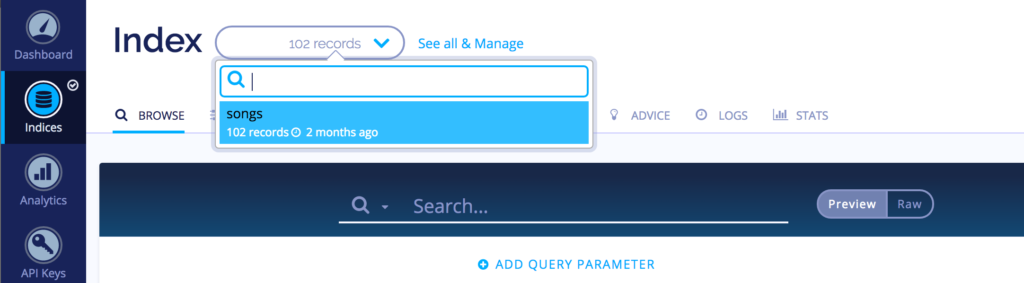
When the indexing process is completed, we can see the index on Algolia by going to Indices and choosing our index name from the drop-down menu:
Indexing is not a one-off task. After the initial import, the index needs to be kept in sync with the database. Since we're using Scout, everything is already taken care of. From now on, any time a record is inserted, updated, or deleted from the database, the respective index record will be affected accordingly - thanks to Laravel's model observers.
To learn more about how Scout manages the indexing process, have a look at the documentation.
Configuring Algolia
The next thing to do is to configure our Algolia index for optimal operation. These settings can be modified either from the dashboard or programmatically using Algolia's API.
The most important configuration options are the Searchable attributes and the Custom Ranking Attributes.
The Searchable attributes setting defines which record attributes are used for searching. The order of these attributes also matters as those at the top are considered more important and control the ranking.
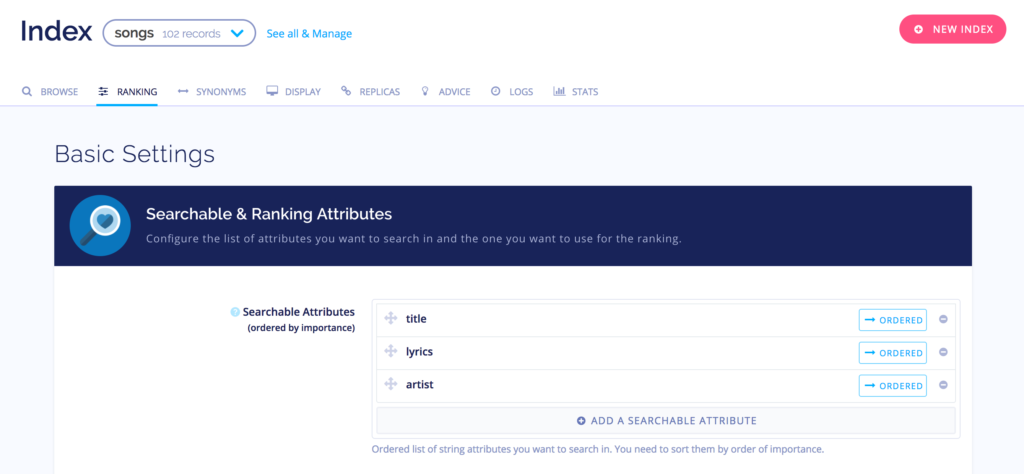
The Custom Ranking Attributes option indicates the popularity of each record which also affects the ranking. They can be anything from the number of likes, views, downloads, to comments. That said, we need to include this information in the index.

Algolia comes with plenty of configuration options. Going through each setting is beyond the scope of this tutorial. To learn more about the configuration options, you should have a look at Algolia's FAQ on configuration and relevance.
Continue reading %How to Build a Lyrics Website with Laravel Scout and Algolia%