How to Master Your API Workflow with Postman
Building good APIs is hard, and anyone who had the chance to do so can relate to this. A project can easily grow to become a mess. One can keep trying to adopt an approach to make it more enjoyable, like trying a documentation-first workflow, but something always feels clumsy.
I was trying out Postman lately, a tool we've briefly covered before, and I discovered that they're doing a great job by providing an integrated environment for different components of an API, like authorization, testing, documentation, versioning, etc.

In this article, we're going to walk through the different features that Postman provides and how we can organize them to make our API workflow less painful.
Making Requests
The first step to discovering Postman is making a simple API request and seeing the response.
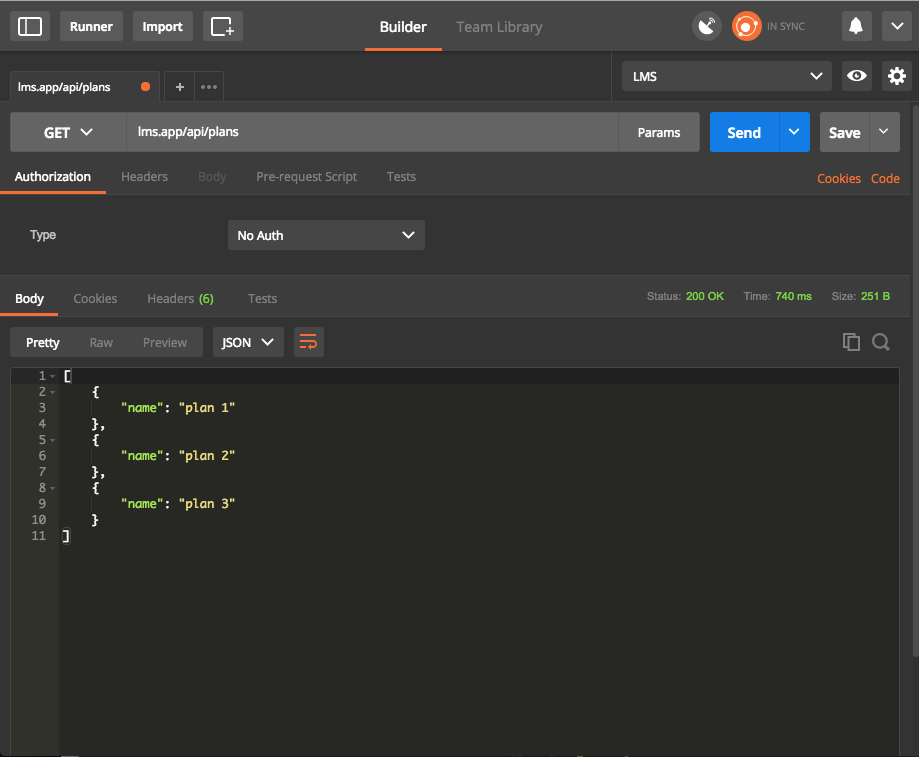
From the screenshot above we can see that the view incorporates different elements. The top bar contains the request method (in this case GET), and right next to it we specify the endpoint to make the request to. If the request has some params we can specify them by clicking the Params button, which will open a table for entering them. When ready, we can click the send button to initiate the request.
The next section contains five tabs:
- Authorization: Specifies how to authorize the request. Like
Basic Auth,OAuth2, etc. - Headers: Any header that should be sent with the request. Like
content-type,Authorization, etc. - Body: Request body for request types like
Post,PUT, etc. - Pre-request Script: JS code to be executed before performing the request. (More about this later)
- Tests: JS code to validate the response payload.
The bottom section contains all the details about the response (status, time and size). The four tabs are self explanatory, except for Tests which contains the tests result if we have any (more about this later).
Authorization
Postman supports all types of authorization, as we saw above. We're going to focus on token authorization set via header. You can read more about authorization here.
The header format that Postman will use is:
Authorization: Bearer <TOKEN>

Now, we'll go ahead and get a token we can use for our future requests. I'm testing on an in-development application of mine, but you can use any application you have lying around, or set one up quickly with Laravel as described here.
Not familiar with Laravel? Try our premium course - it's a comprehensive introduction, and you'll get the upcoming newer version of it automatically if you grab it in its current iteration!
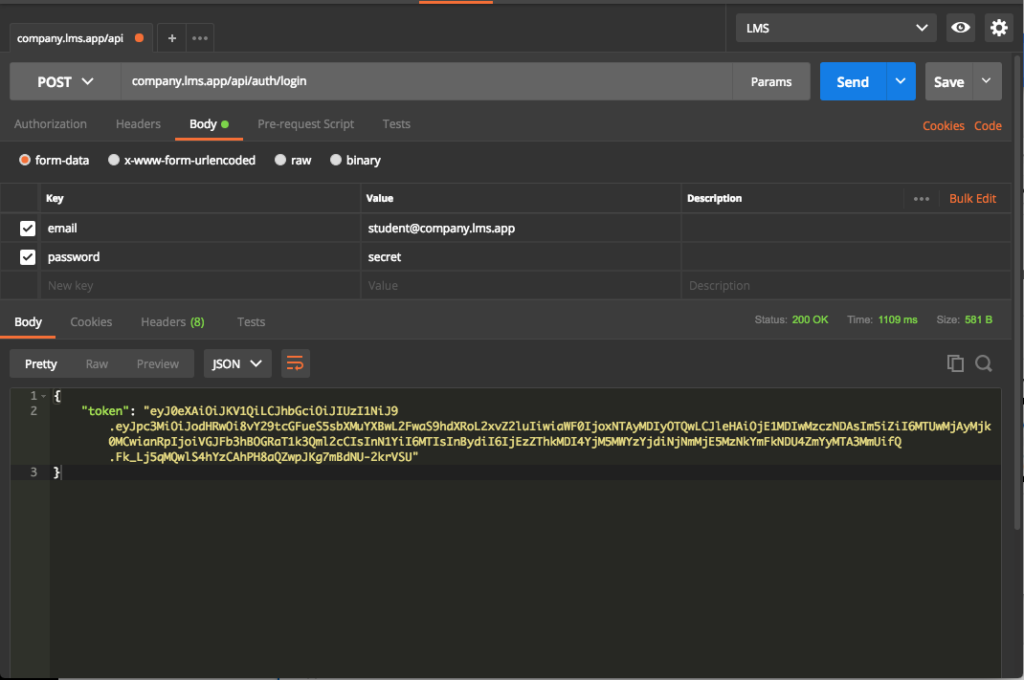
At this point, we have a token to be used for querying data from the API as an authenticated user. However, copying and pasting the token for every request is tedious!
Environment Variables
This nice feature alleviates the pain of copy/paste and groups our variables in one place. An environment is an execution context: we may have a local environment, testing, staging, etc.
Postman has different scopes for variables:
- Global
- Environment
- Local
- Data
The global variables are available everywhere, separately from the selected environment. You can read more in the documentation.
We need at least three variables for now:
domain: current active subdomaincompany1,company2, etc.url: our app URL.token: Token for future authentication.

Truncated by Planet PHP, read more at the original (another 932 bytes)